Create your first workspace and start collaborating with full control in Drumee
As with any team collaboration, you often end up switching between multiple tools just to manage files, chat, schedule meetings, and control permissions. This constant context-switching slows everyone down and creates fragmented data. The objective is to keep everything in one secure place and move forward efficiently while maintaining full sovereignty over your information.
Drumee eliminates the need to jump between apps. Now that we have the basics down for getting started, it’s time to get the ball rolling on your first workspace.
Section Overview
In this section you will learn:
- How to start with Drumee
- Create workspace
- Upload real work + Search for files/ folder
- Invite members
- Chat with your team
- Schedule meeting with your team
- Grant permissions
- Try out AHA features
1. How to start with Drumee
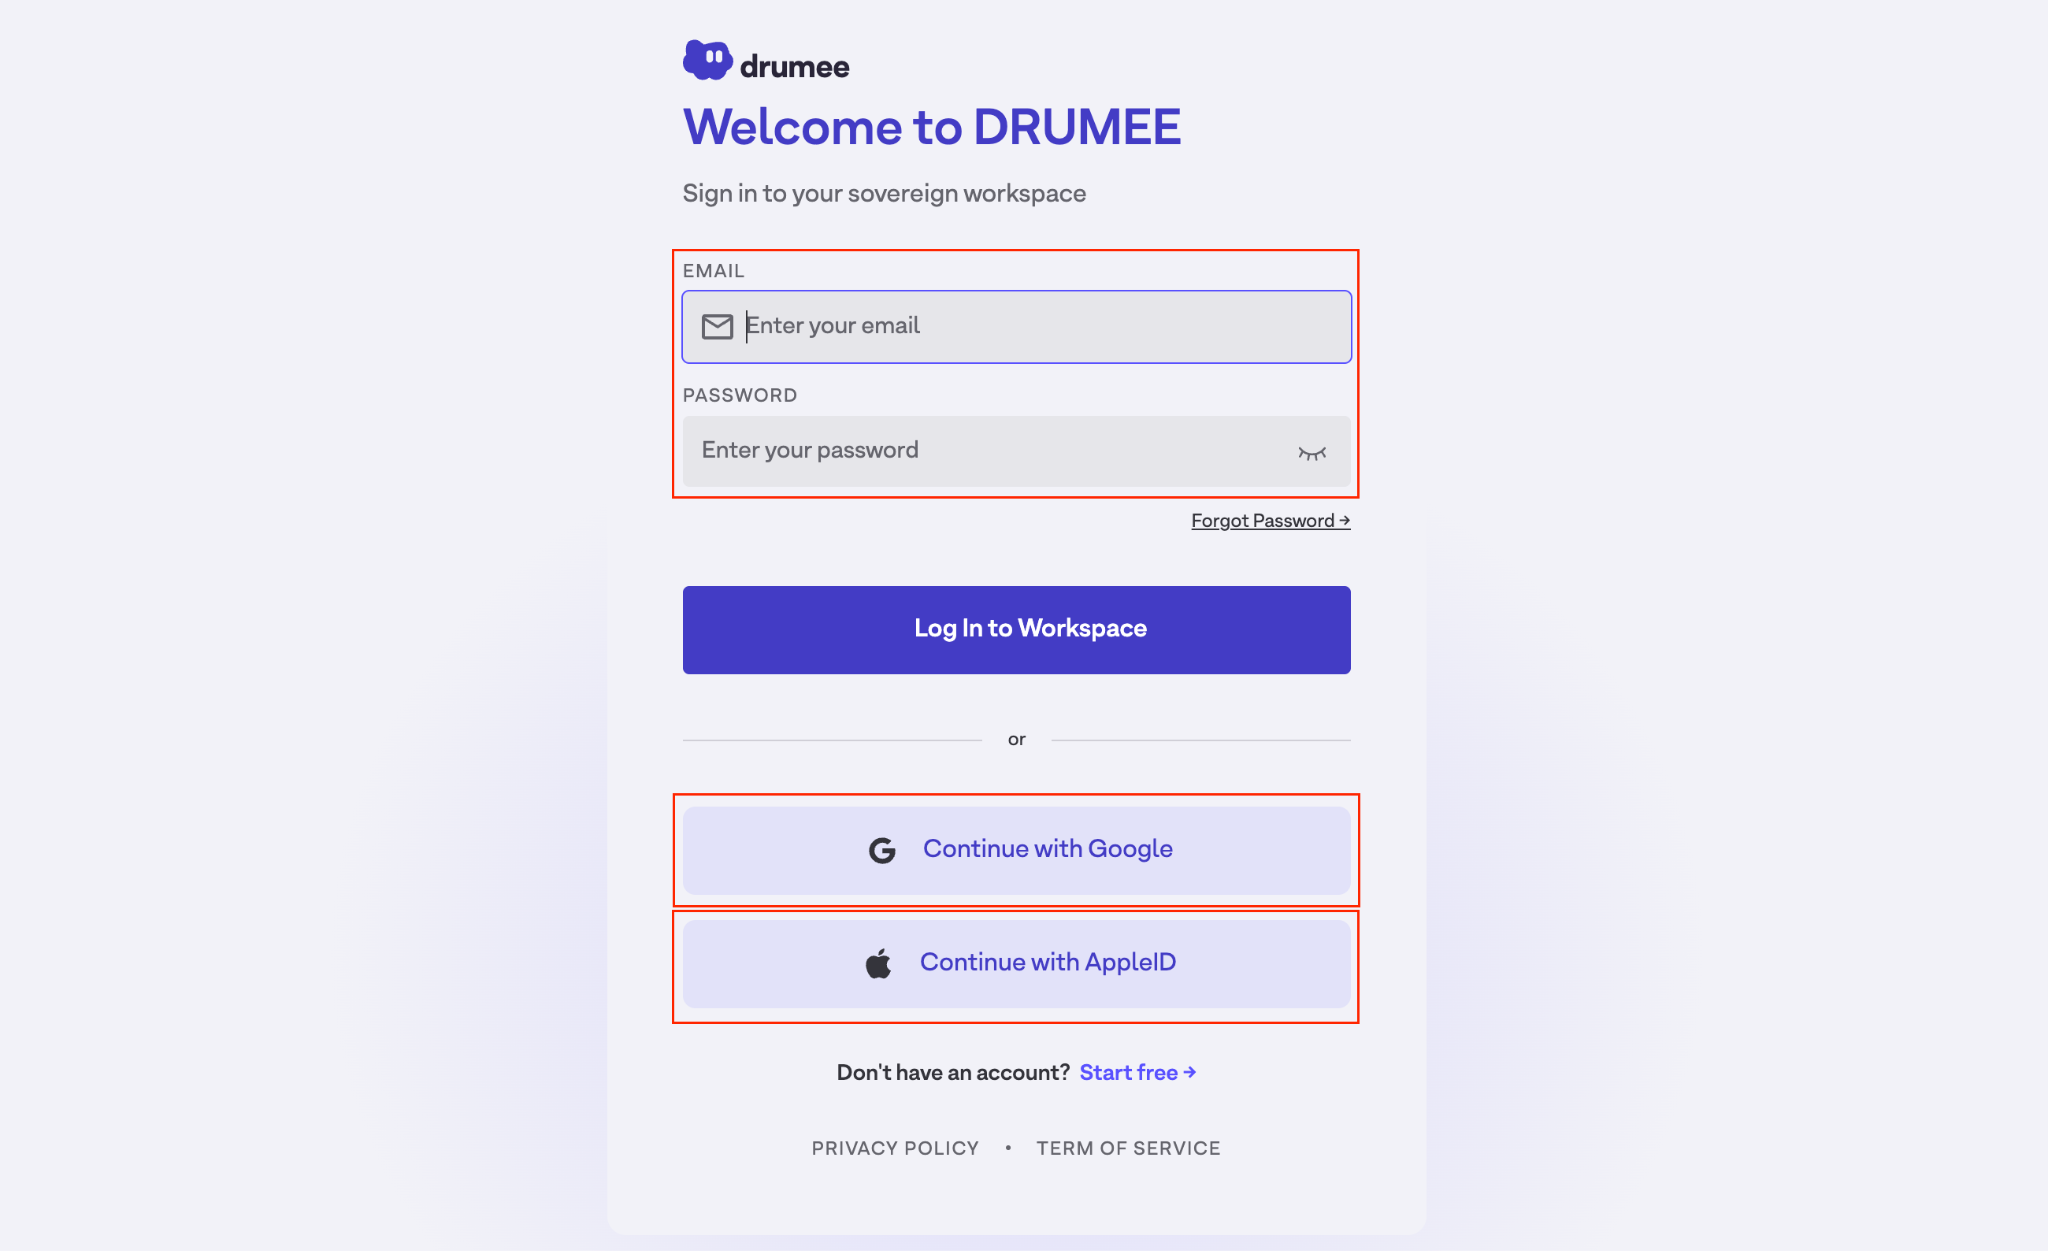
Step 1: Go to app.drumee.com
Step 2: If you don’t have an account yet:
=> Click Start free (bottom of the page) to create your account.
=> Or click Continue with Google / Continue with AppleID.
Step 3: If you already have an account:
=> Enter your email + password.
=> Then click Log In to Workspace.
Once you’re inside, you’ll land on the Home page - ready to create your first workspace.
2. Create Your First Workspace
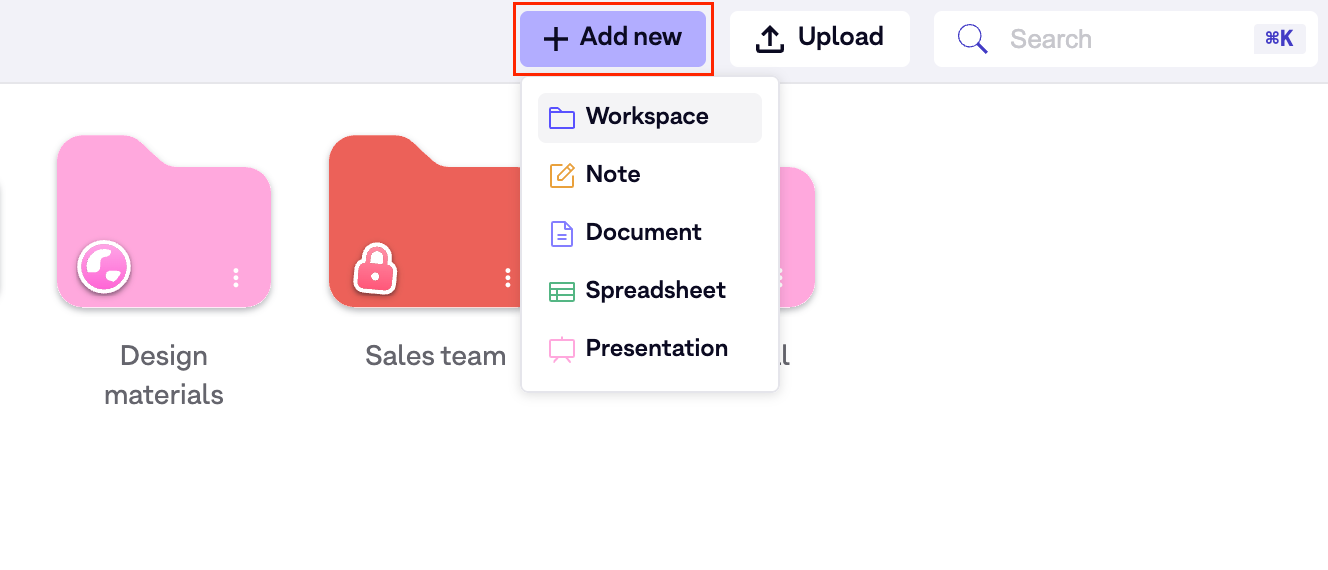
Step 1: Go to “Home page” => Click + Add New.
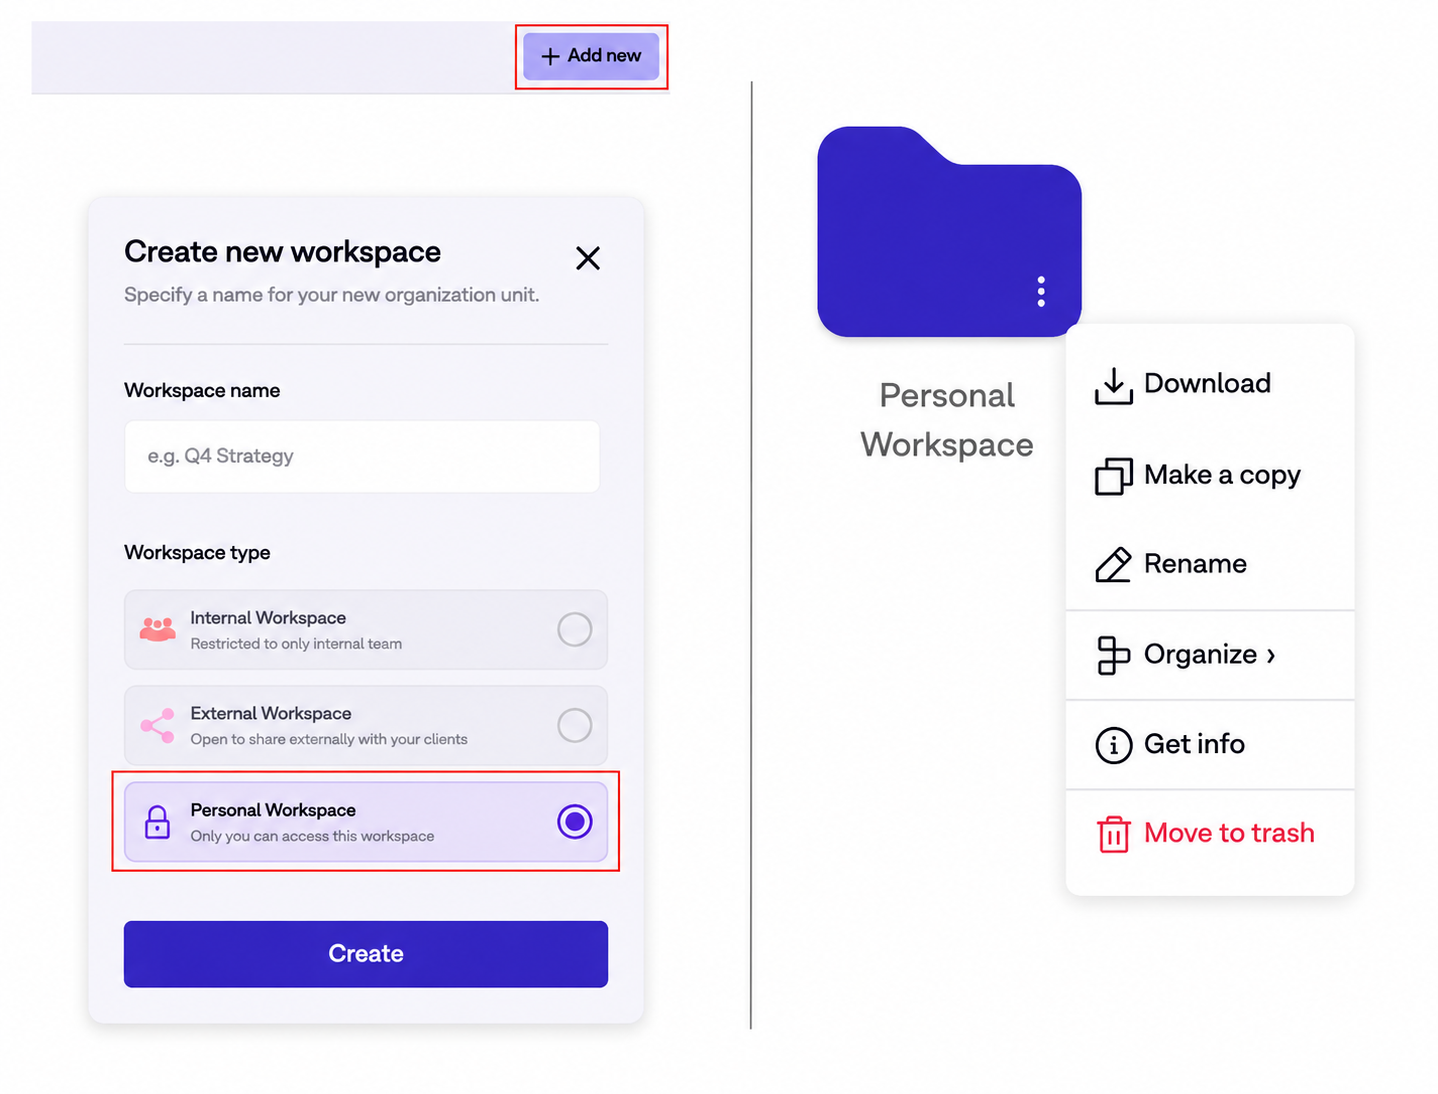
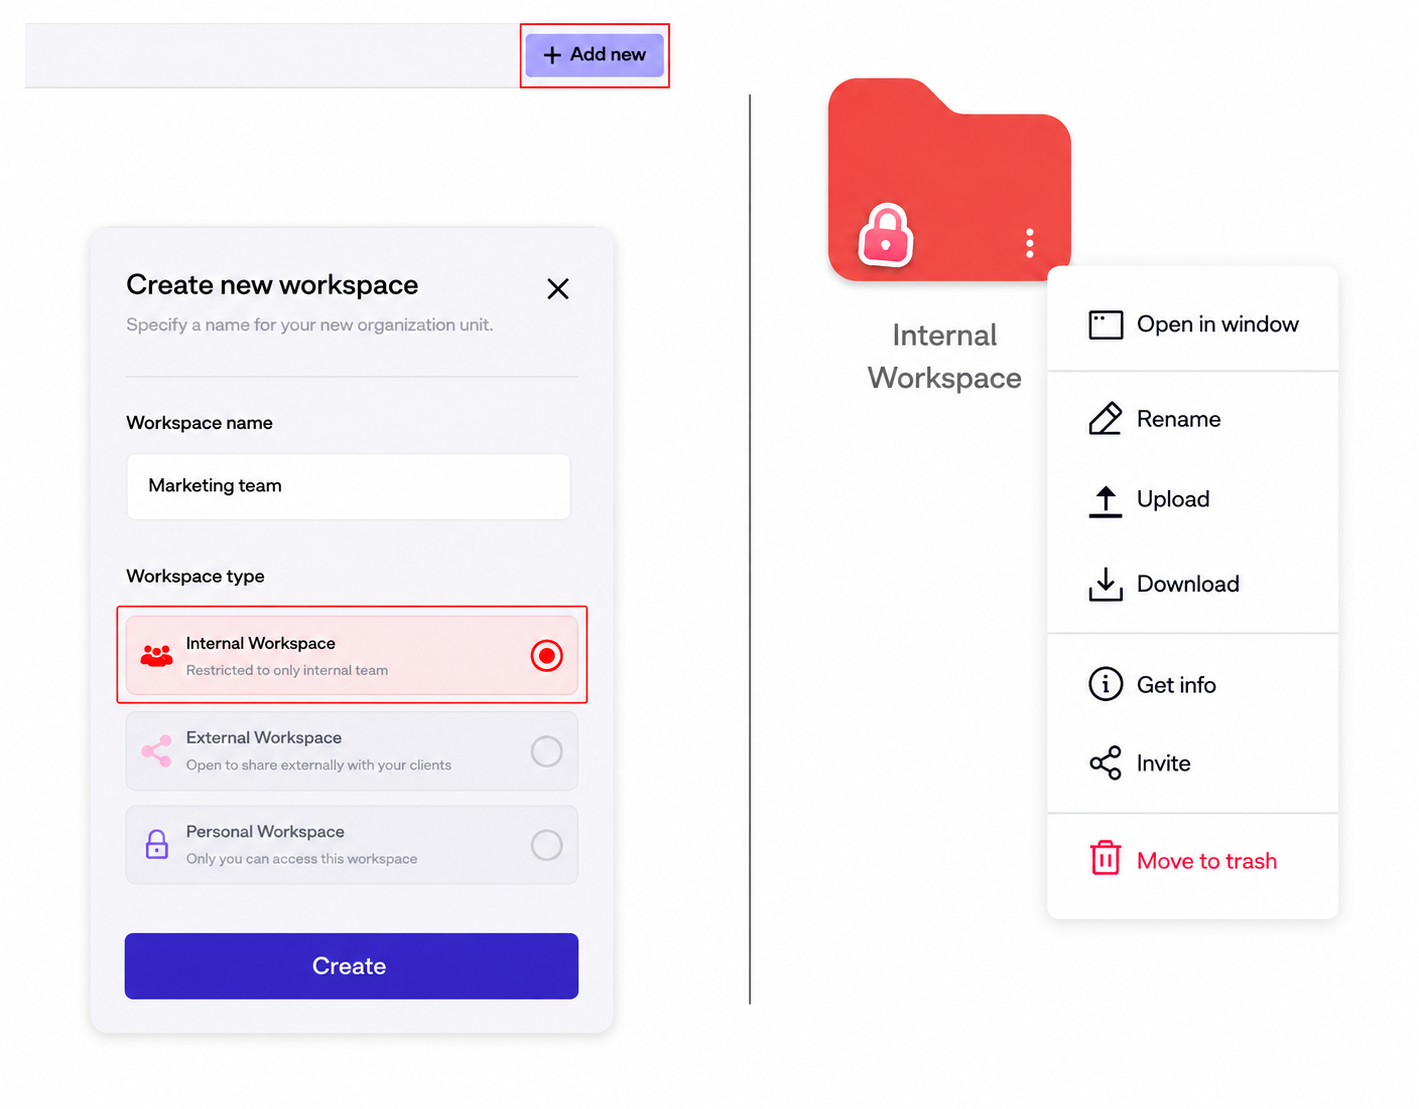
Step 2: Choose your type of Workspace.
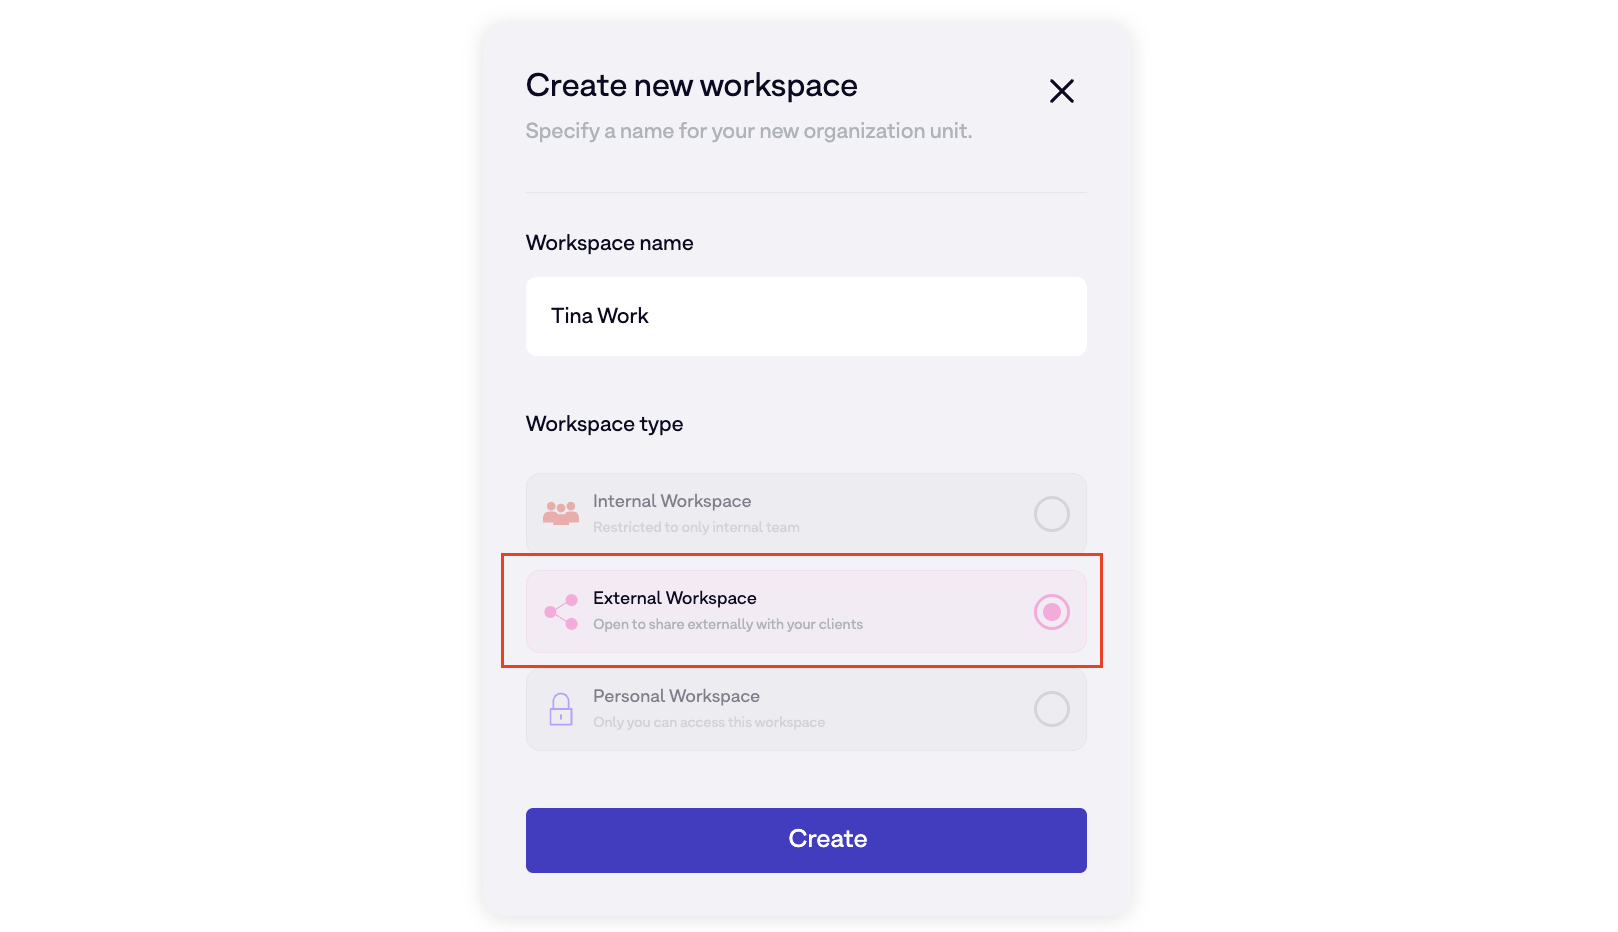
There are 3 types of workspace in Drumee:
- Personal / Private folder: Use this workspace to manage your personal work, including drafts, private research, notes, temporary files, and personal knowledge.
- Team / Internal folder: Use this workspace to collaborate securely with your internal teams on ongoing projects: Marketing, Sales, Product, Finance, and other organizational workstreams.
- Shared / External folder: Use this workspace to collaborate with clients and partners while securely sharing proposals, deliverables, review materials, and other external resources.
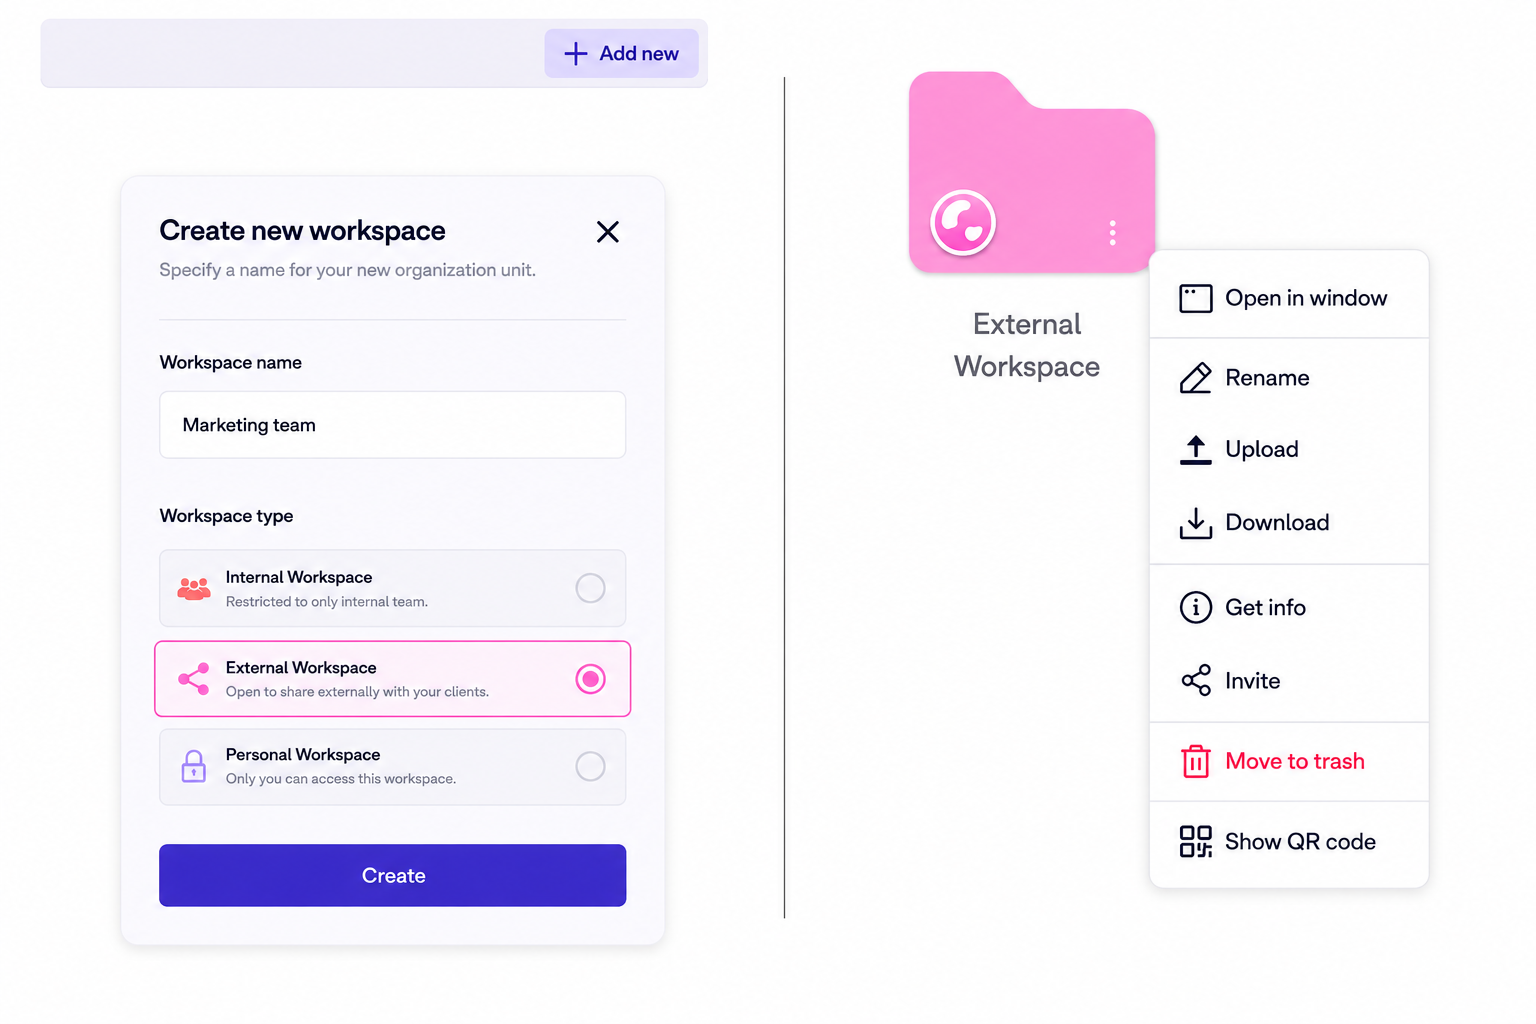
Step 3: Click “Create” => Create your workspace instantly.
3. Upload + Search for files
3.1 Upload New Files
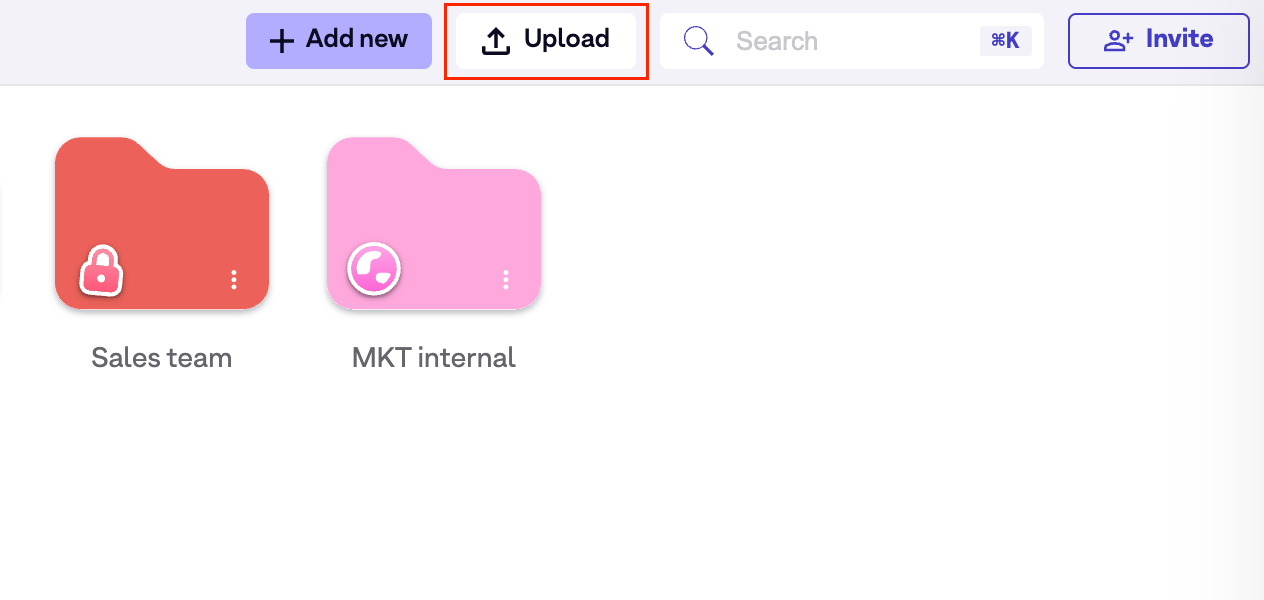
Step 1: Go to “Home page” => Click Upload.
Step 2: Choose files from your device.
Step 3: Upload in Drumee workspace.
3.2 Search Your Files
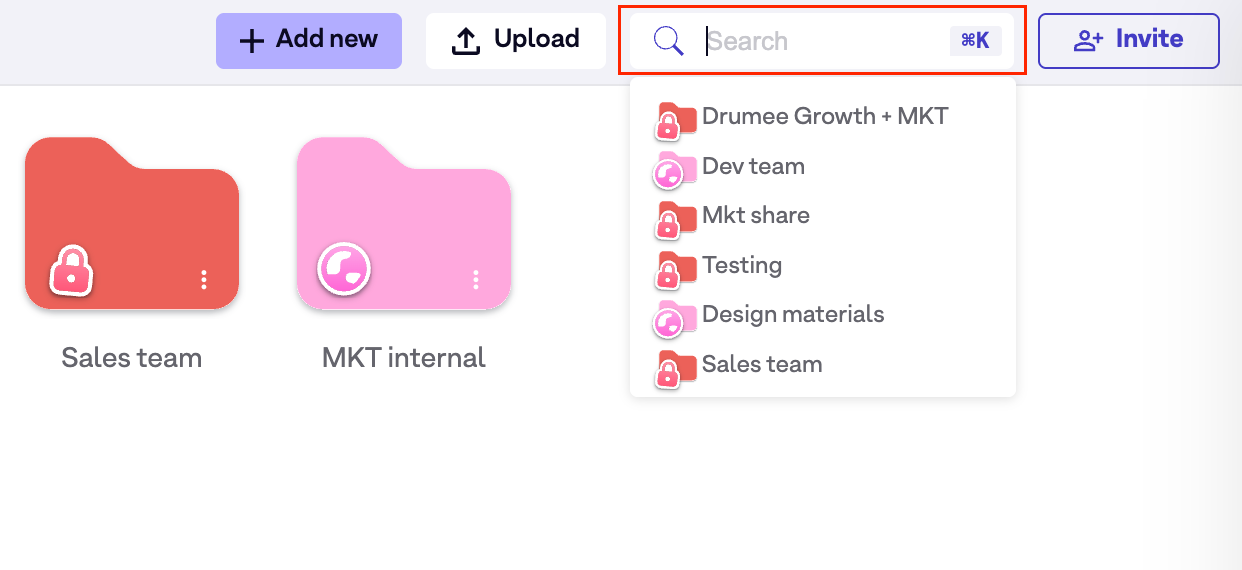
Step 1: Go to “Home page” => Type in the Search bar.
Step 2: Quickly find any workspace, file or conversation across everything.
Step 3: Choose the file/folder you’re looking for.
4. Invite Members
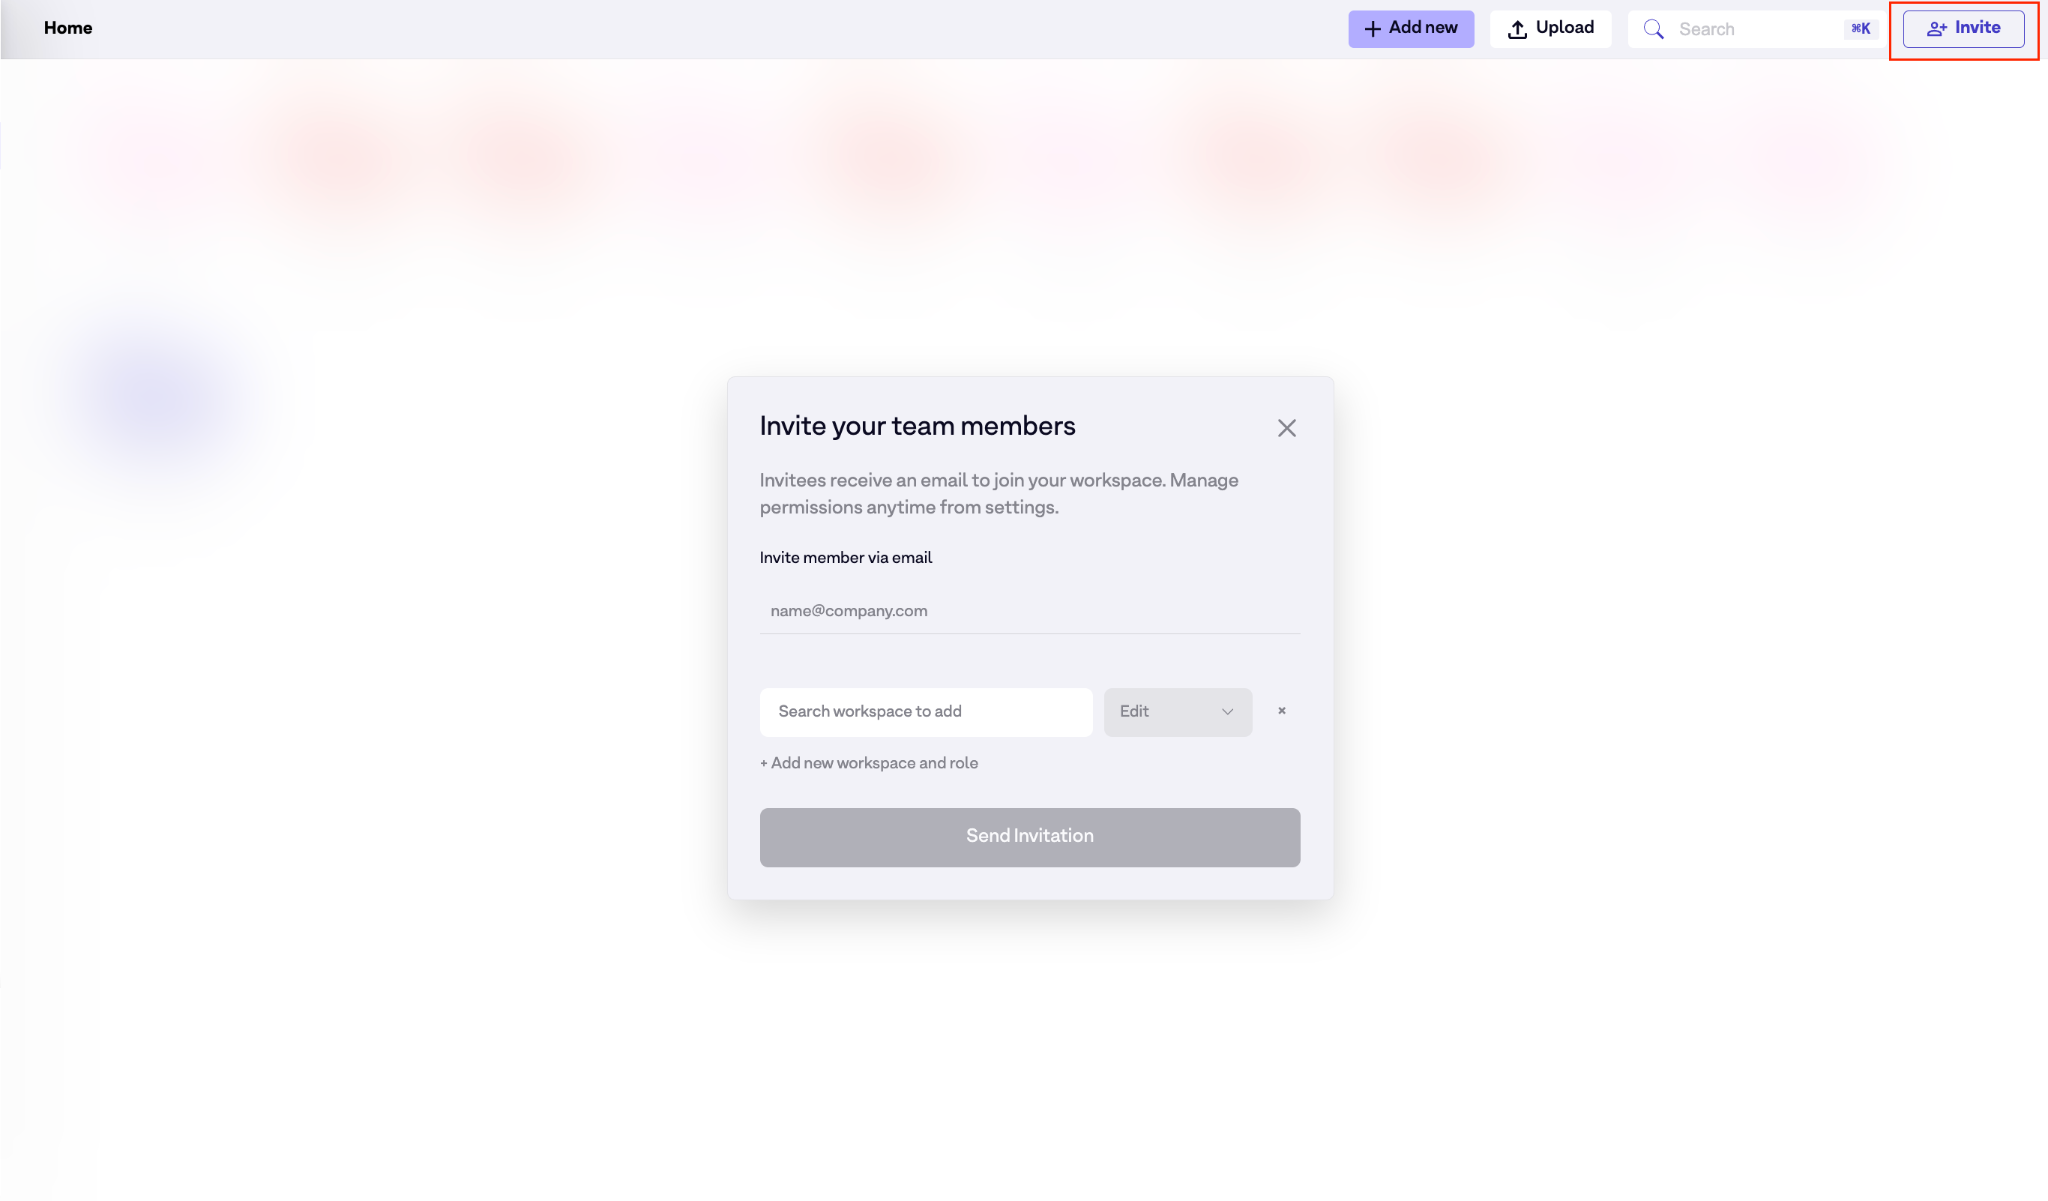
Step 1: Go to “Home page” => Click “Invite”.
Step 2: Enter email, choose workspace & role.
Step 3: Click “Send Invitation”.
5. Chat with your team
Keep conversations attached to the work, no context lost between apps.
| Feature | What it does |
|---|---|
| @mentions | Mention team members directly in the chat thread. |
| File tagging | Tag a file with /filename to start file-based discussions. |
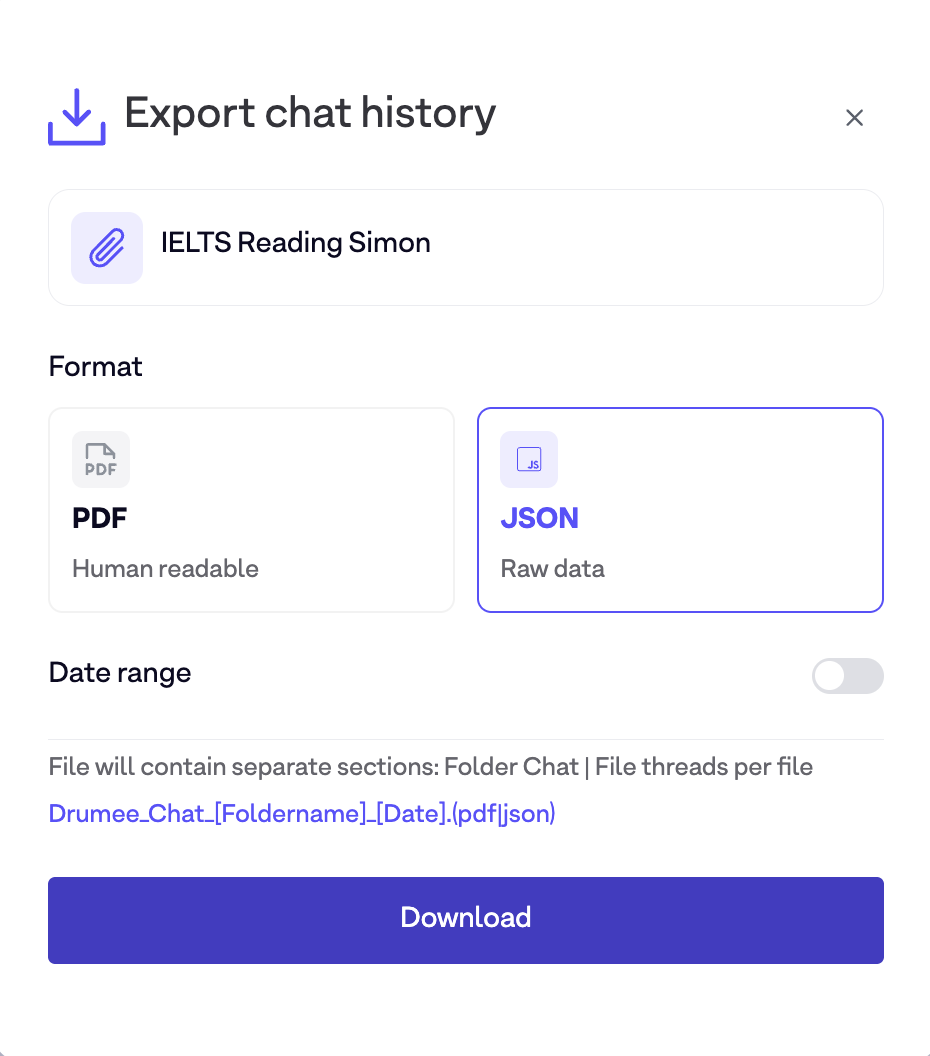
| Export history | Download the full chat history of the folder when needed. |
5.1 Chat in folders
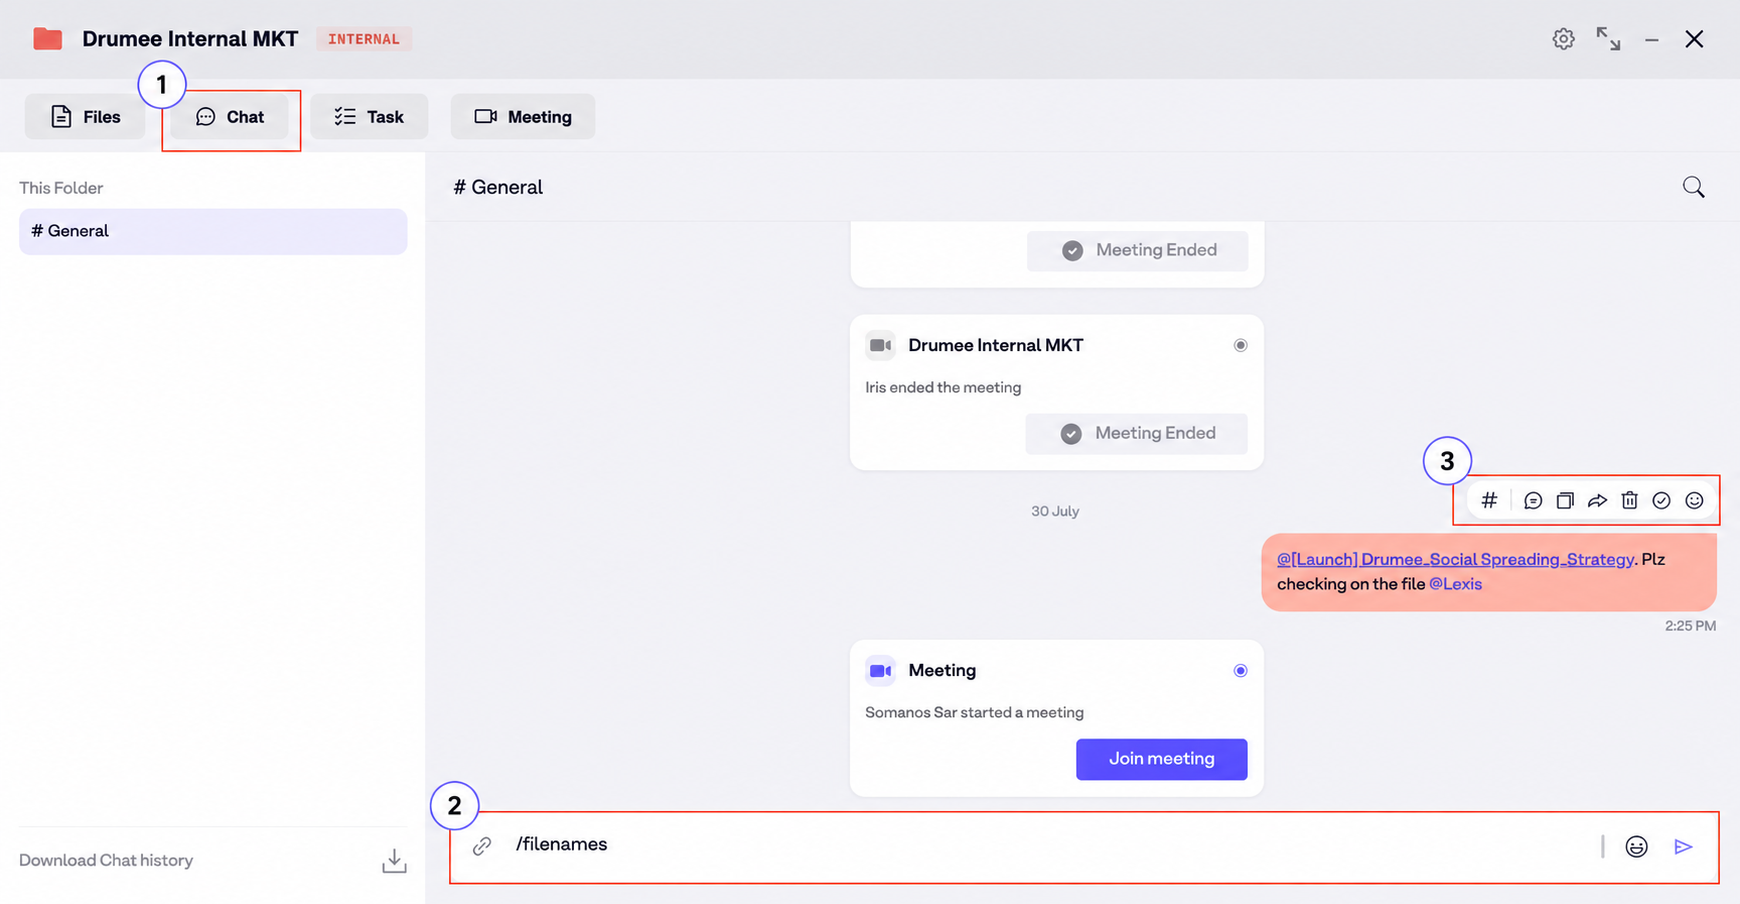
Step 1: Click “Chat” in the folder.
Step 2: Drop files: /filenames in the chat box.
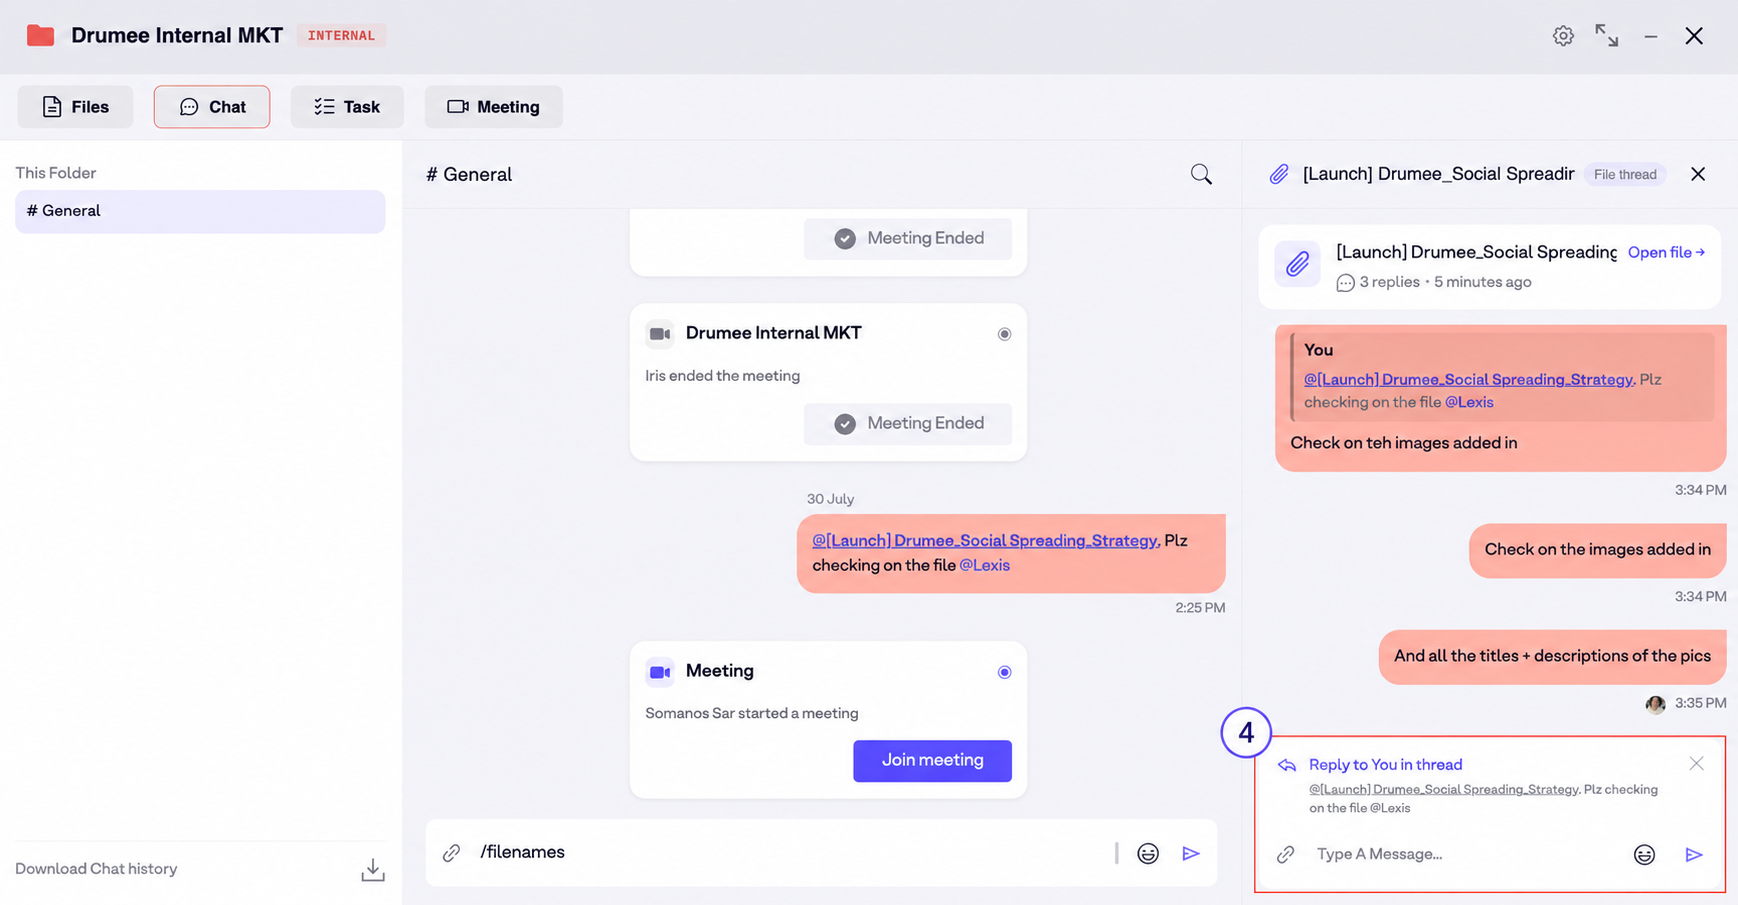
Step 3: Click “#” to open chat threads.
Step 4: Discuss in the chat box on the right sidebar.
5.2 Chat in files
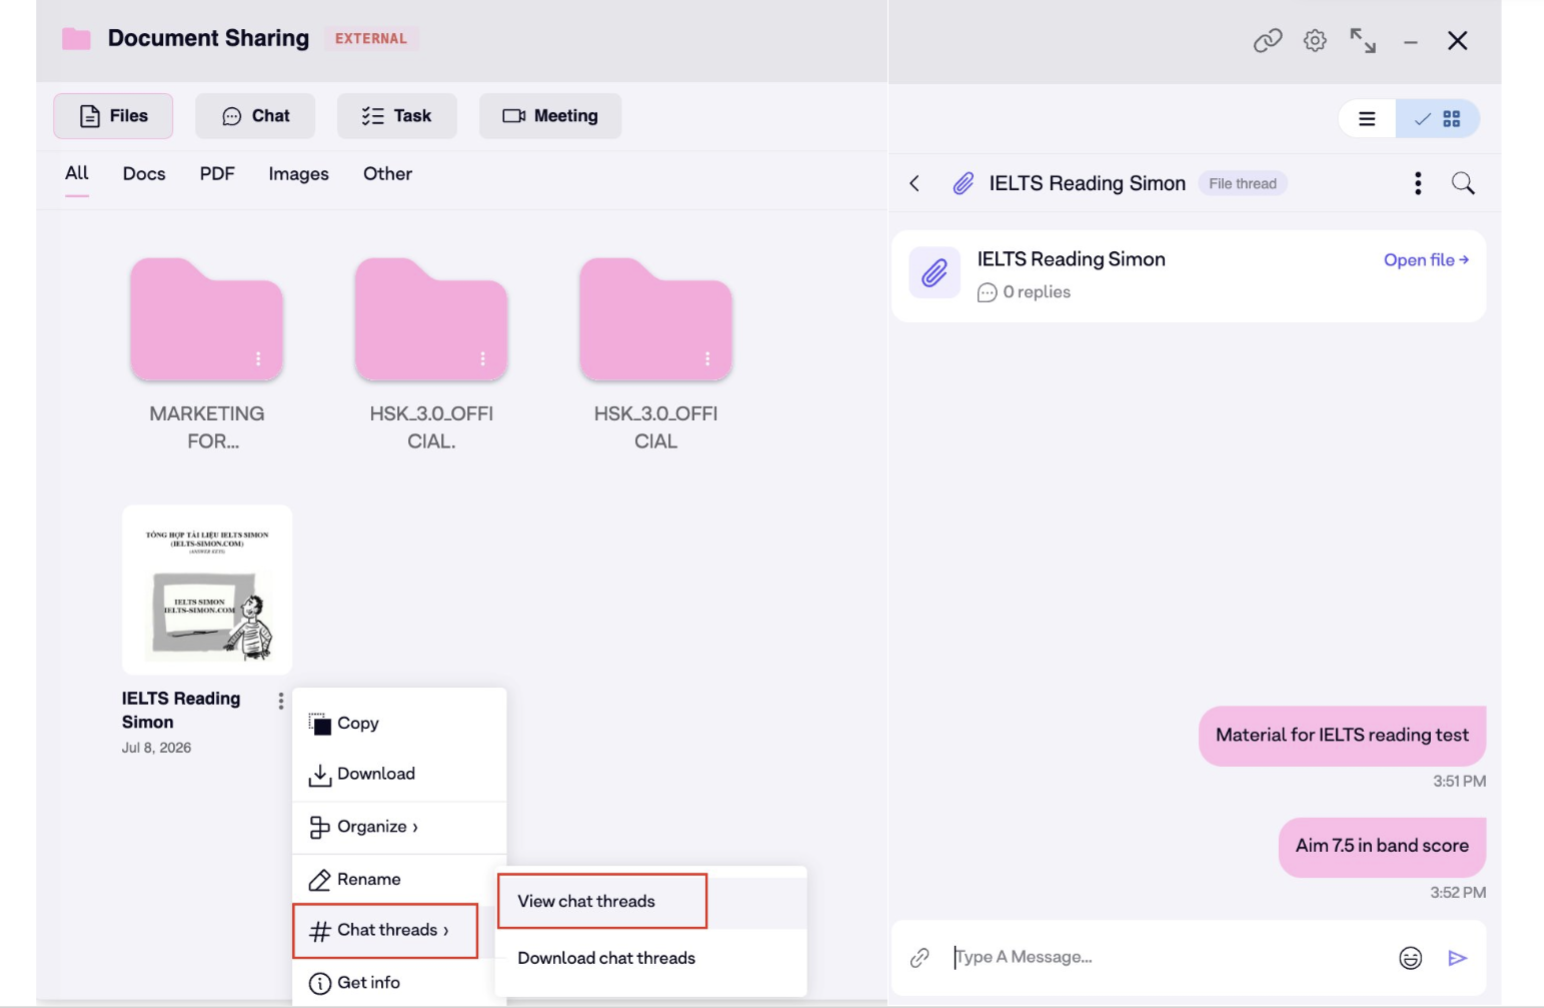
Step 1: Click on the file → Select “Chat threads” to start the conversation.
Step 2: Select View chat threads to see the whole chat history & continue the conversation.
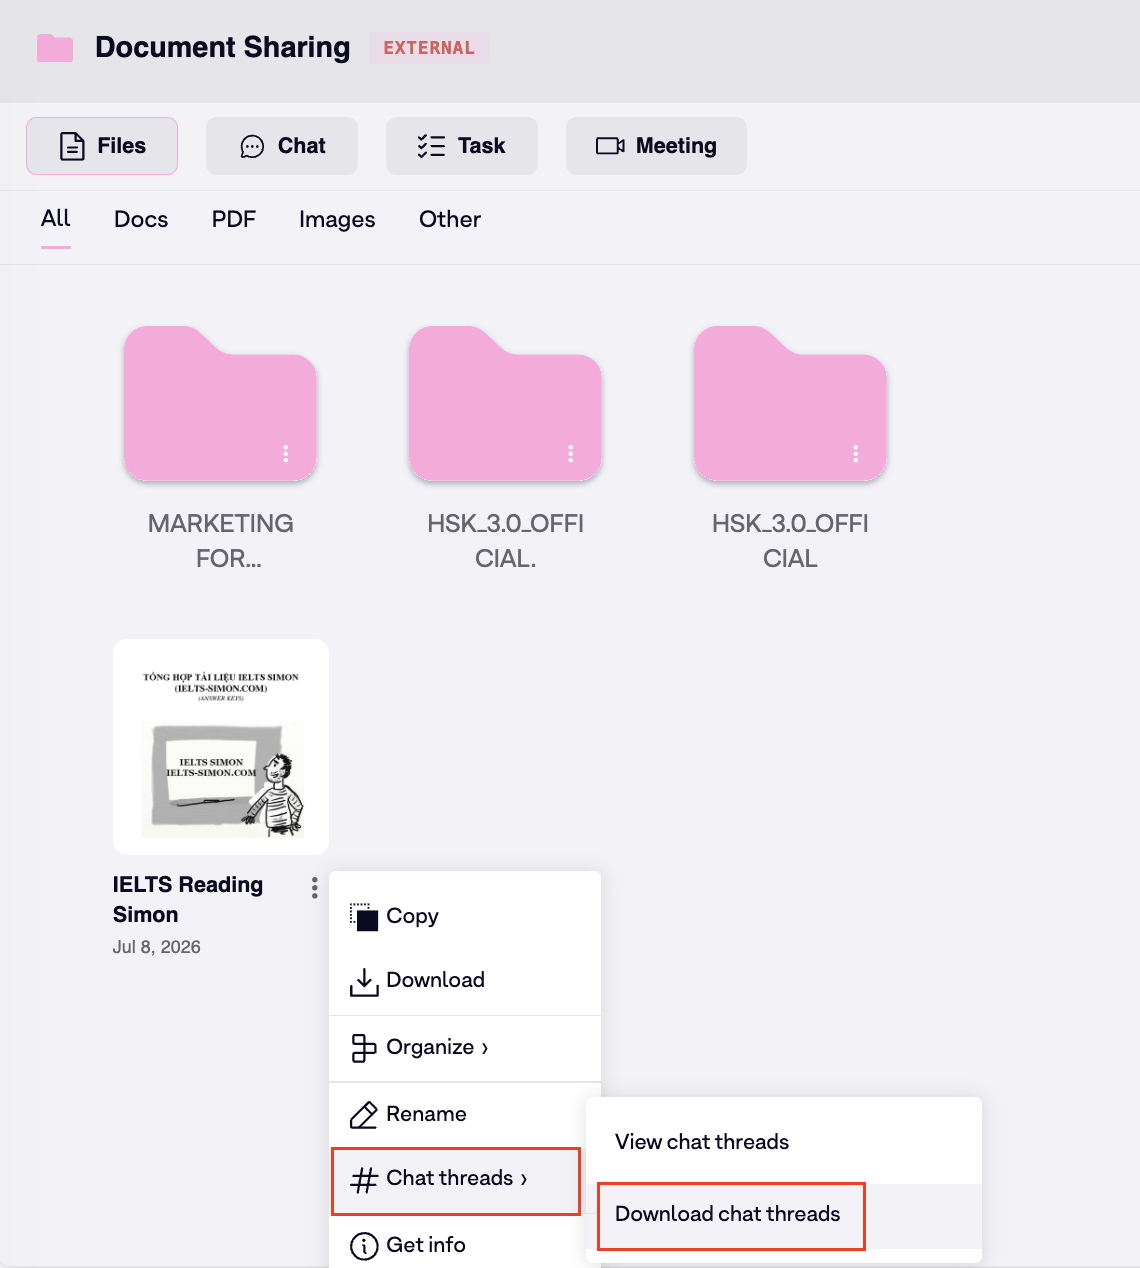
Step 3: Select Download chat threads to download the whole chat history.
6. Meeting with your team
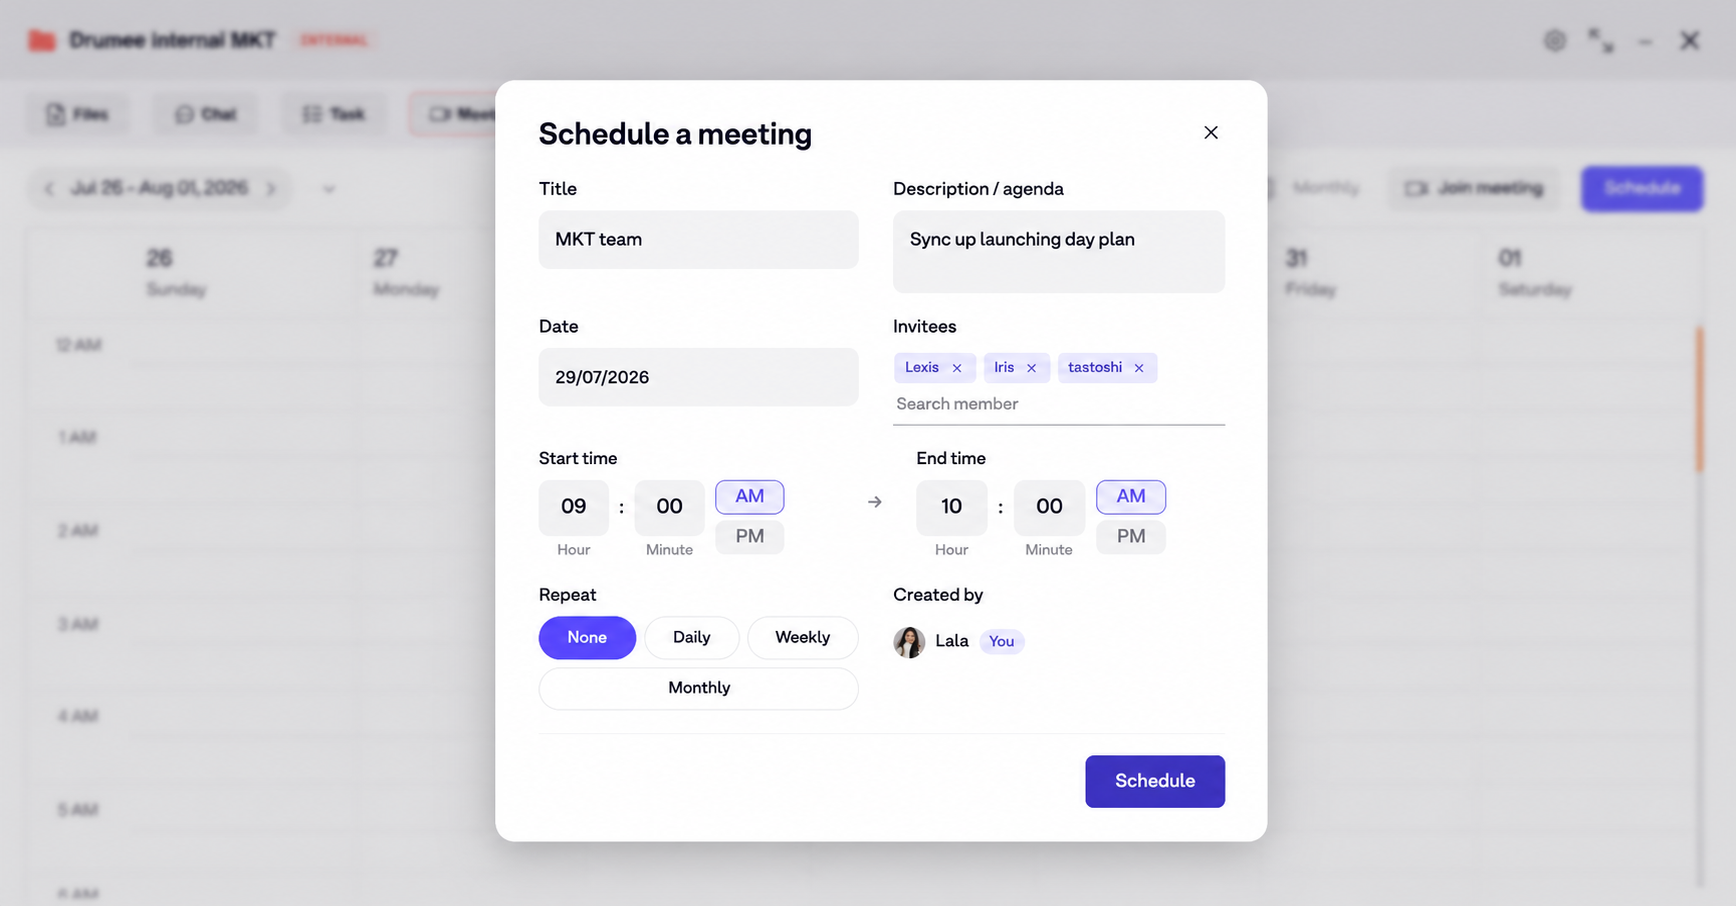
Use “Meeting” to schedule and join meetings without leaving the folder, keeping every discussion within the same project context.
Step 1: Open folder => Select “Meeting”.
Step 2: Click “Schedule” on tab bar => Set up meeting details.
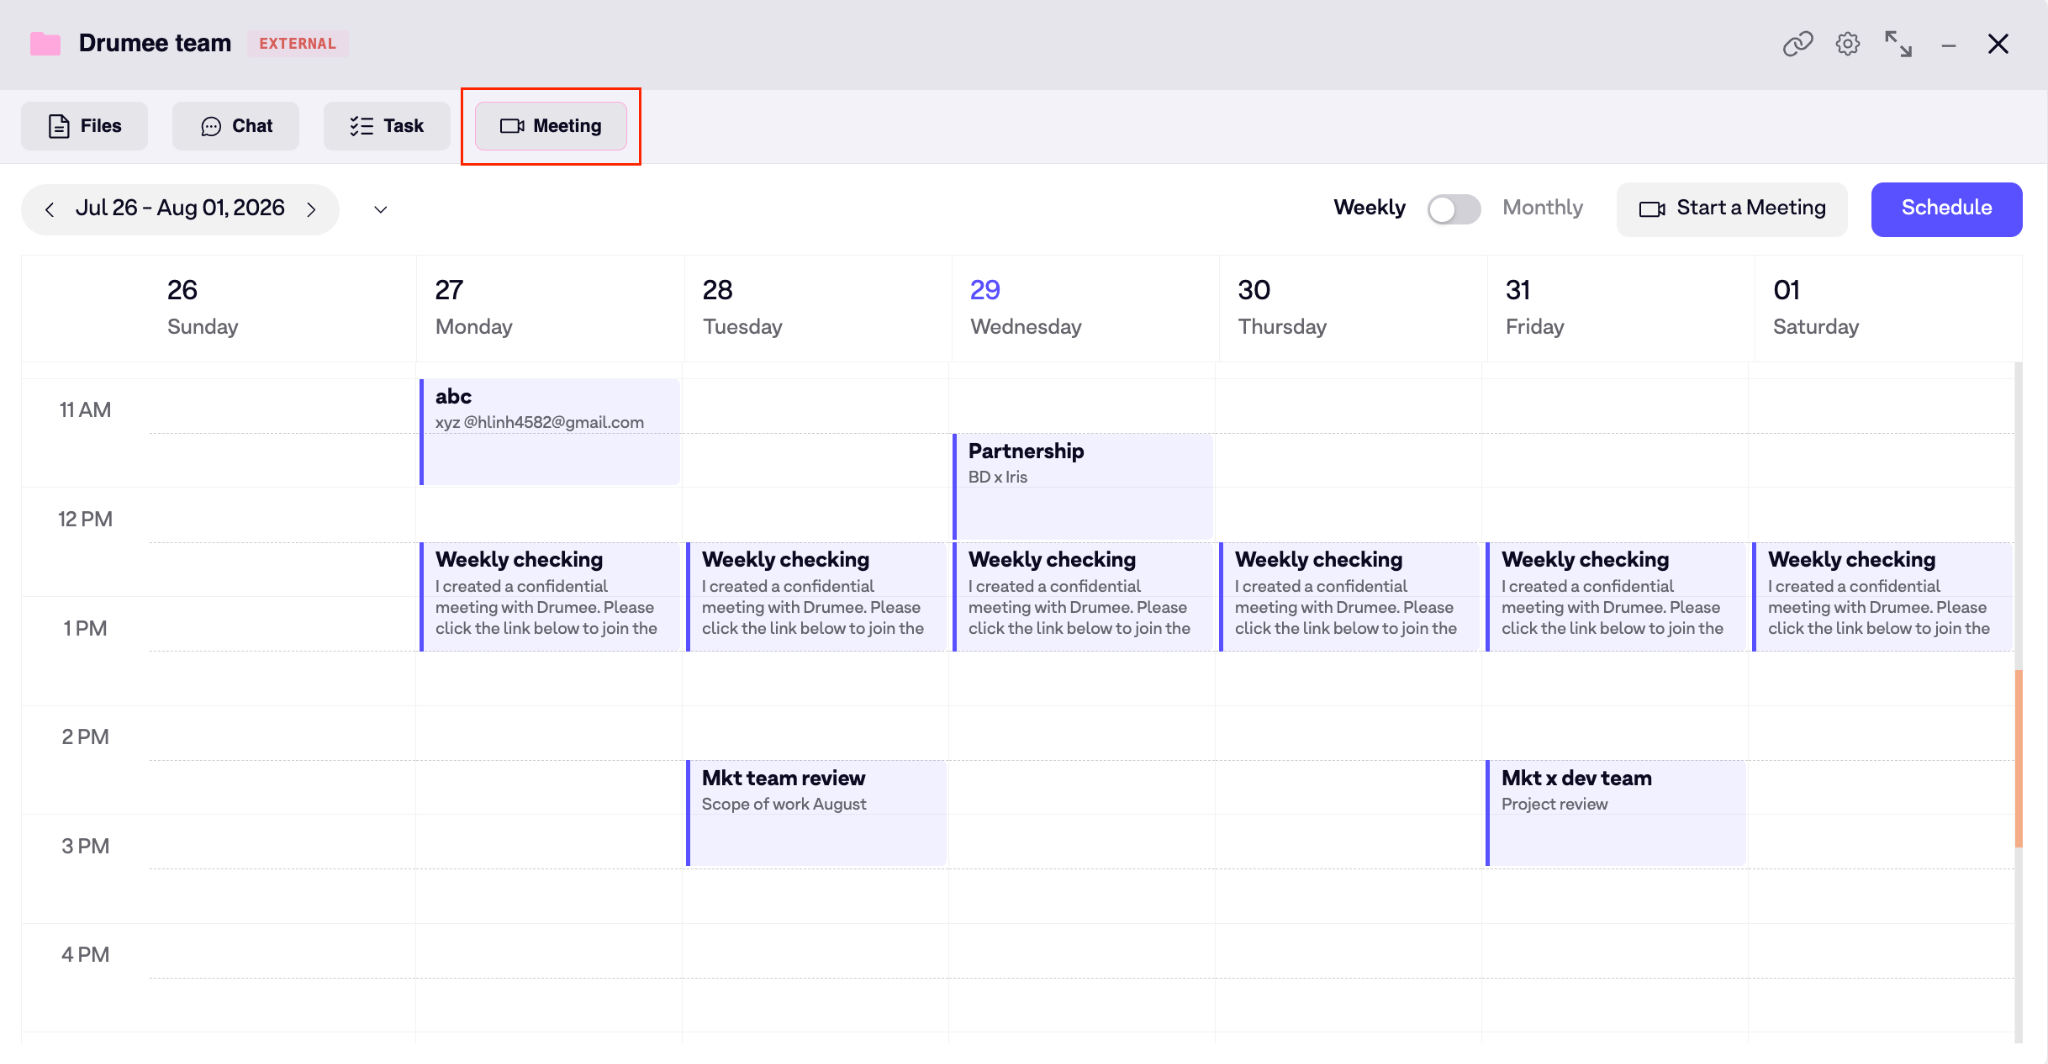
Step 3: Click “Schedule” to complete.
7. Grant permissions
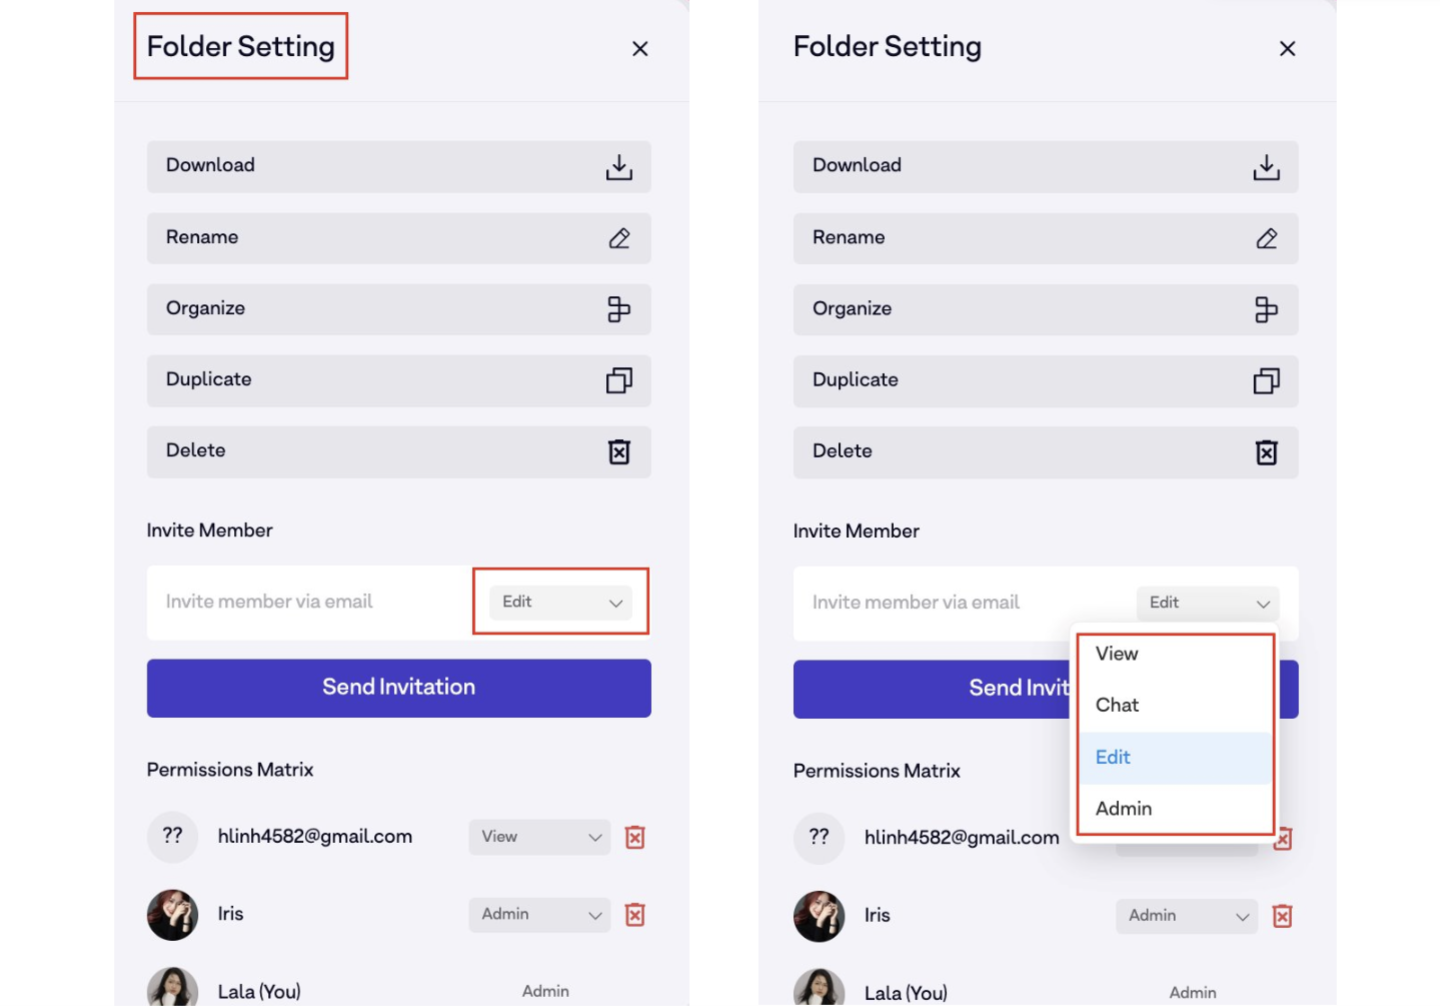
Use “Permissions” to control folder-level access by defining who can view, edit, and share files while tracking their actions in one place.
Step 1: Open folder → Go to “Setting”.
Step 2: Enter member’s email address.
Step 3: Choose the permission status that need to send.
8. AHA Moments
8.1 Secure Share
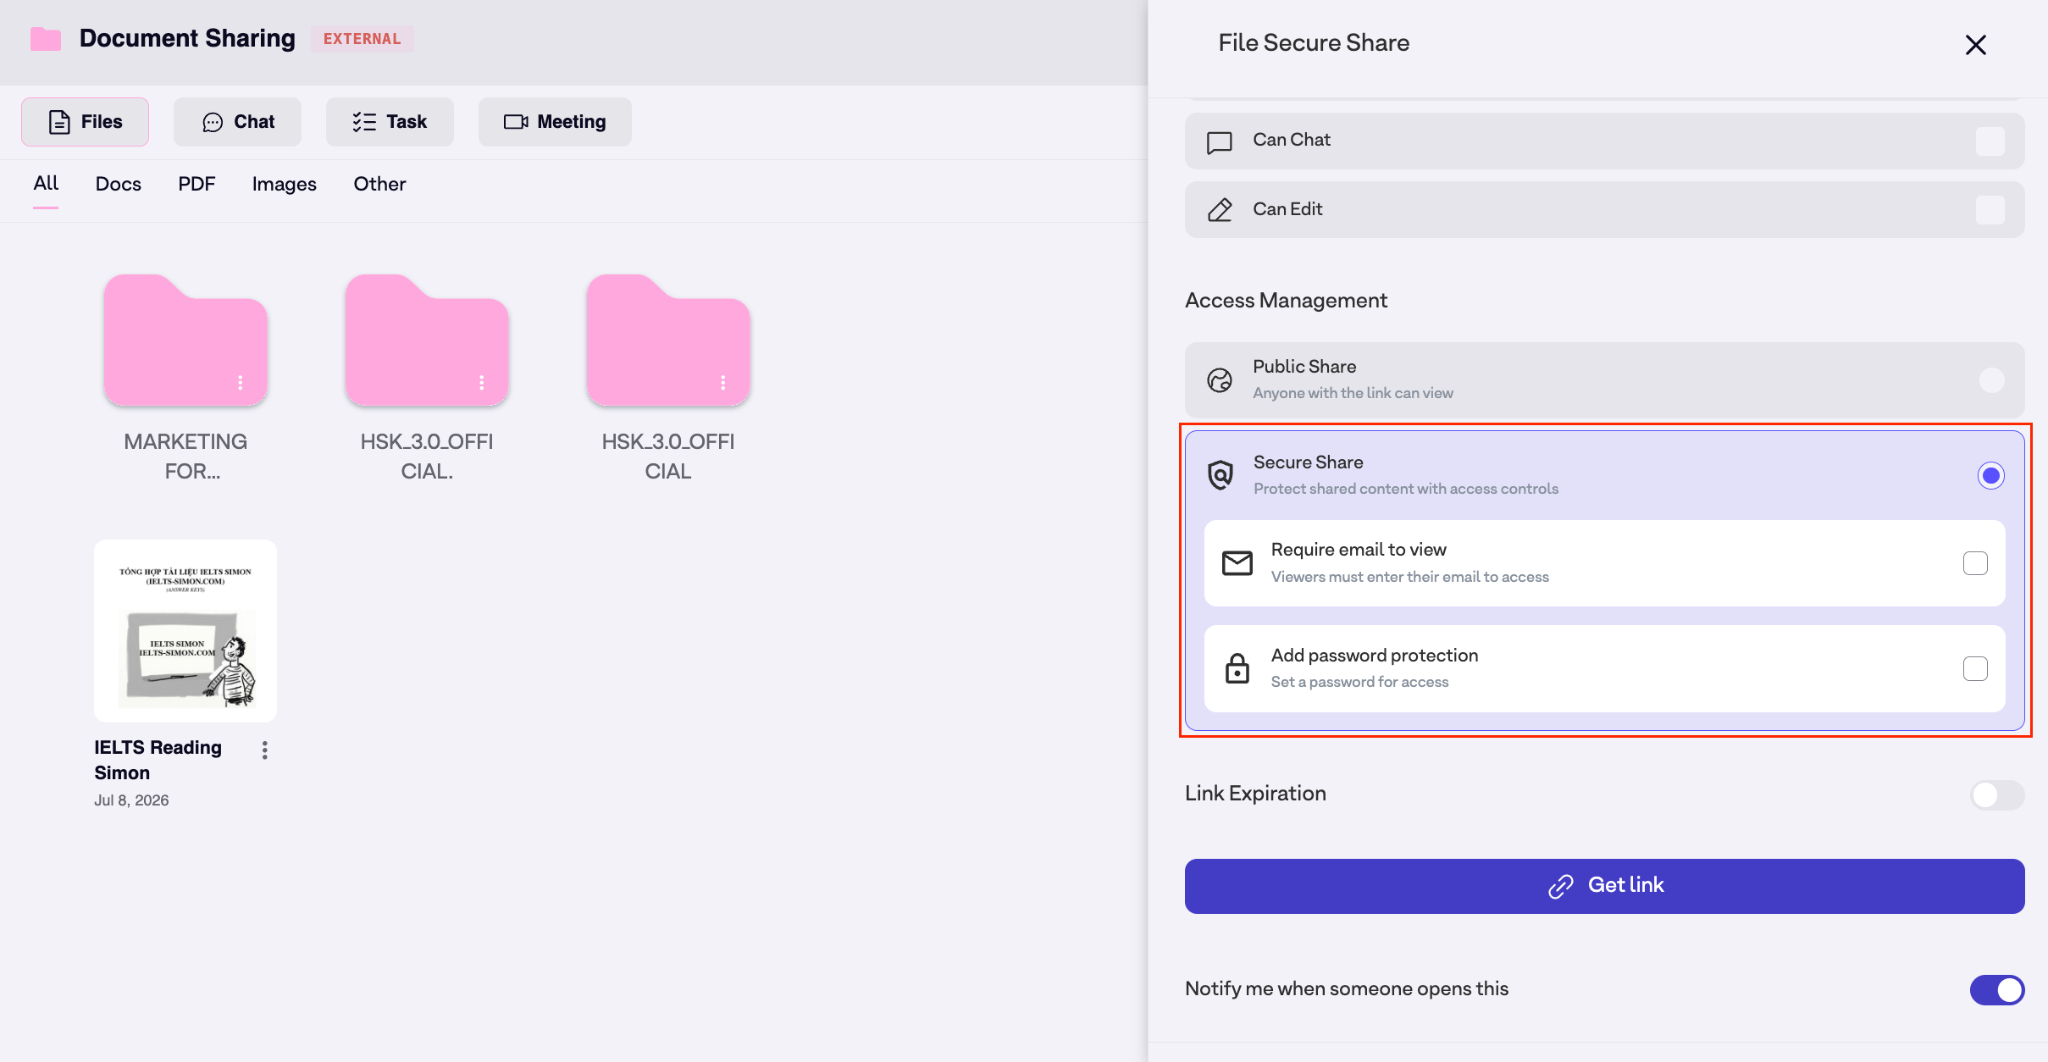
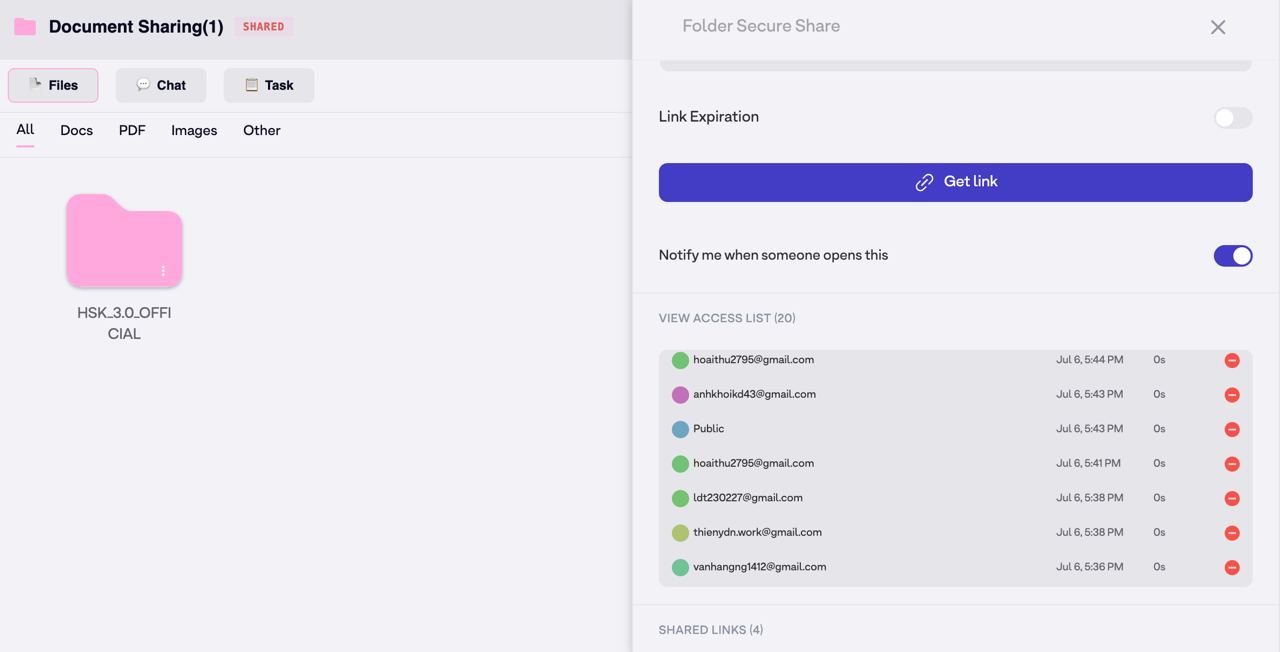
Use “Secure Share” to send confidential files to clients outside your workspace while controlling access with:
| Feature | What it does |
|---|---|
| Password protection | Require a password before recipients can open the link. |
| Expiration date | Set a date after which the link automatically stops working. |
| Email verification | Require the recipient to verify their email before accessing. |
| Granular permissions | Choose between View, Chat, Edit, Download access. |
| Activity log | See exactly when the file was opened and by whom. |
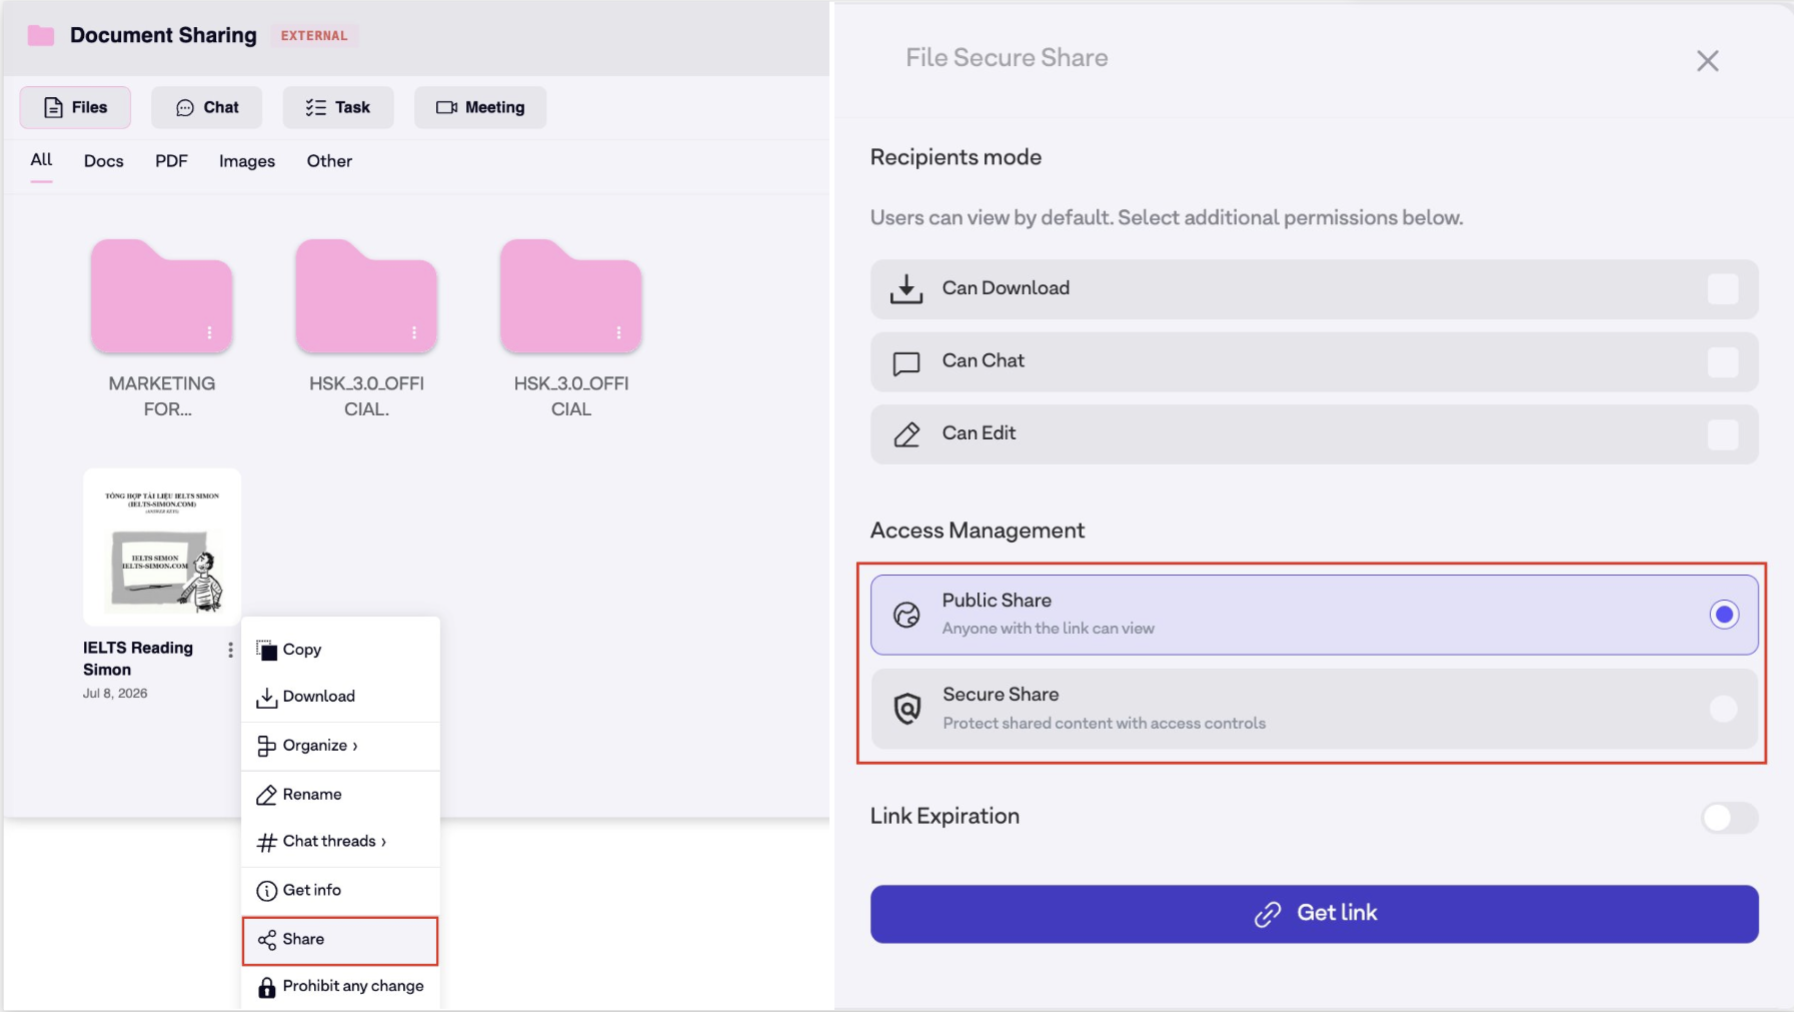
Step 1: Click on folder → Select “Share”.
Step 2: Select Secure share.
Step 3: Choose Require email review/ Add password for protection.
Step 4: View access log to your files in the access list.
8.2 Google Drive Migration
Move entire projects or departments into Drumee with a single click, original folder hierarchy preserved, no rebuilding from scratch.
Step 1: Go to “Setting” => Click “Import”.

Step 2: Process the “Verify & Import” actions.
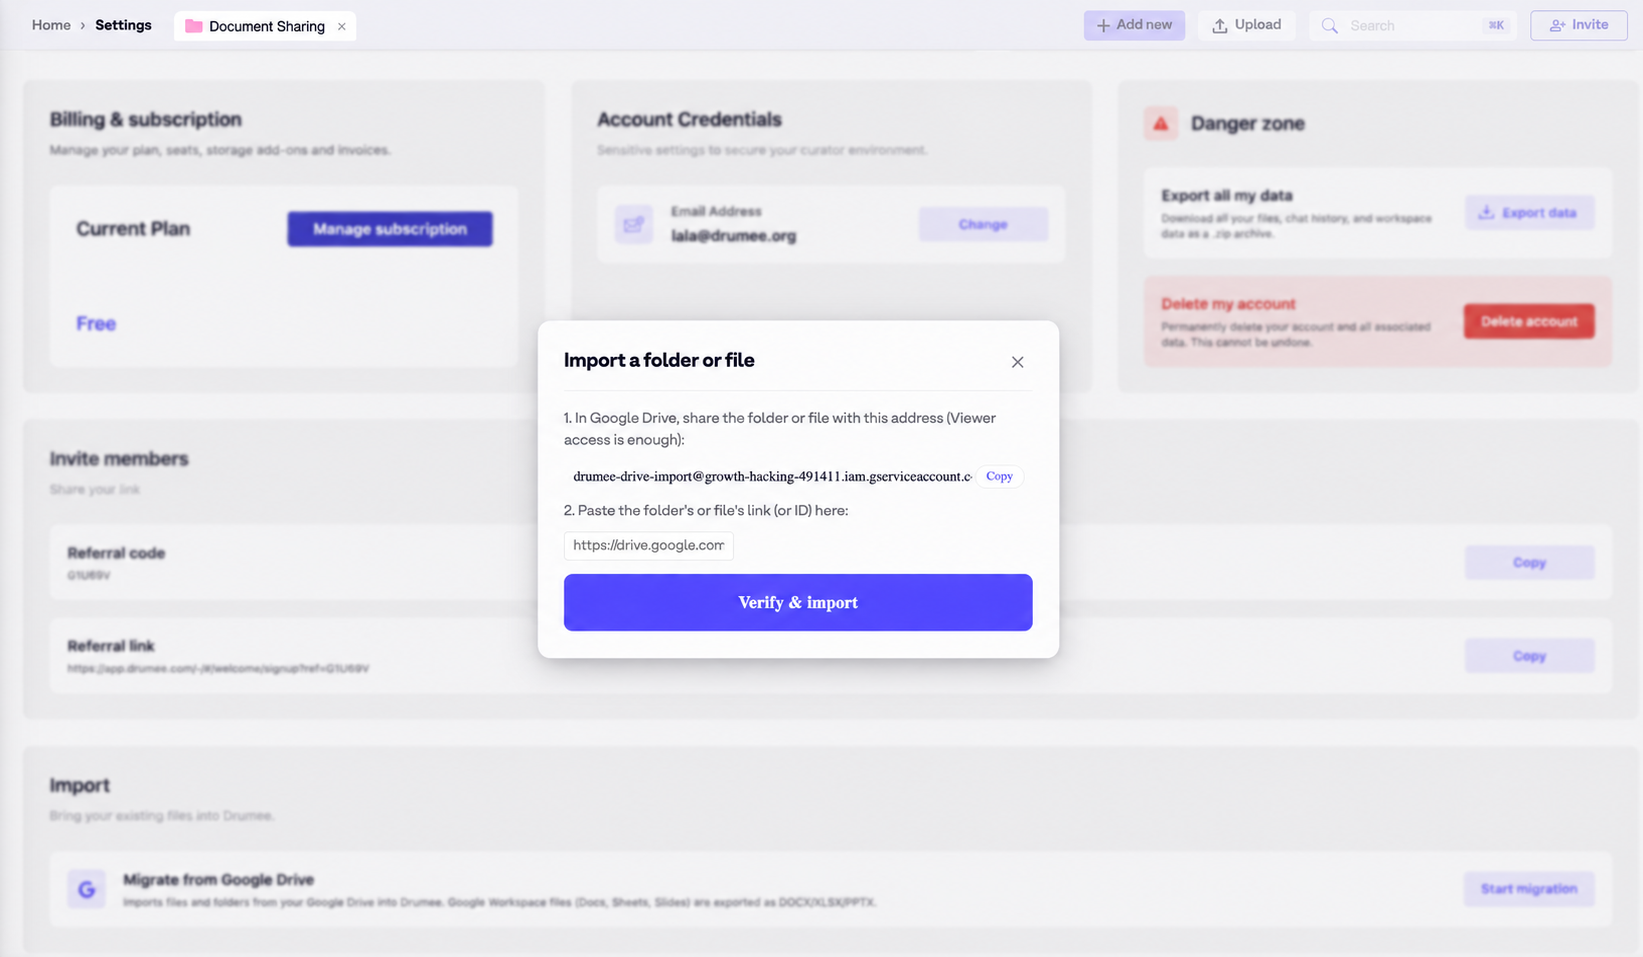
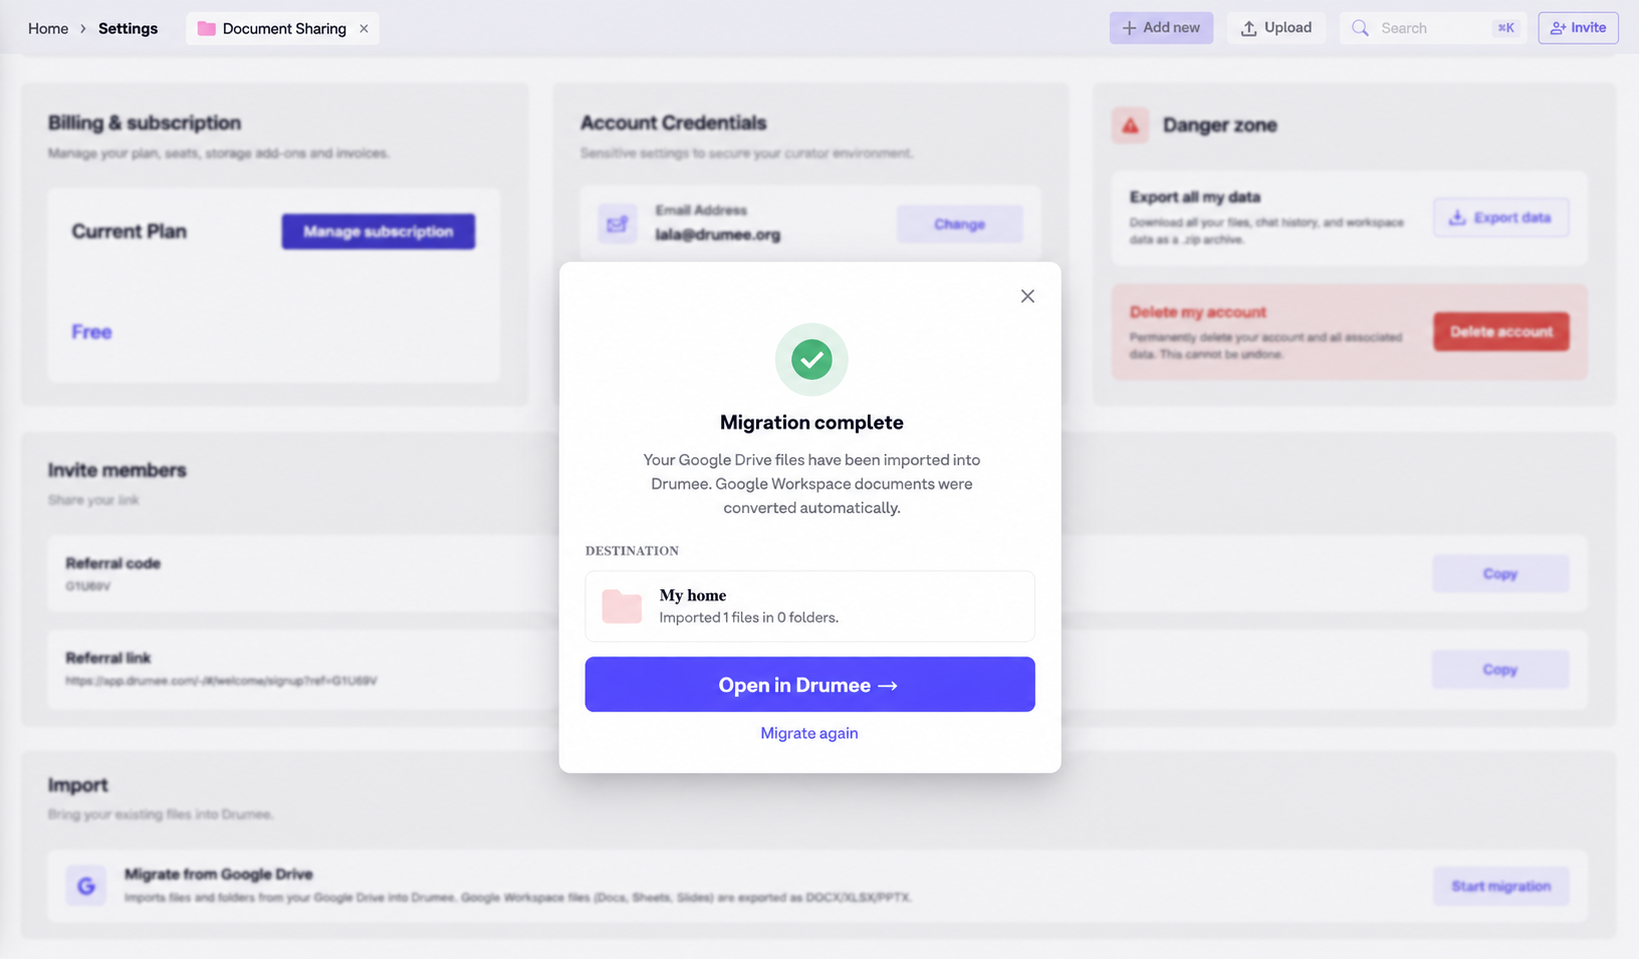
Step 3: Migration completed.